ChirpNextBuildChanges » History » Revision 11
« Previous |
Revision 11/20
(diff)
| Next »
Dan Smith, 12/16/2022 08:30 PM
Differences in CHIRP-next
- Table of contents
- Differences in CHIRP-next
- The "spreadsheet" memory editor
- Easier to navigate multi-memory editing
- Unified bank editor
- Settings editor
- Simplified import and export
- Improved navigation
The CHIRP-next build includes a new GUI, effectively re-written from the ground up. Where possible (and desirable) we tried to keep the look and feel consistent. However, that was not possible in all cases, and in many cases, users will find the new GUI feels more native on their platform. Some little-used, confusing or redundant features have been omitted, and some are still yet to be developed. This page covers some of the high-level changes you can expect to see.
The "spreadsheet" memory editor
The legacy chirp build used a sort of row-based layout that felt foreign to many users expecting a spreadsheet-style interface, and was not very friendly for keyboard-based navigation. The new builds use something that looks and feels more like a spreadsheet, hopefully with fewer clicks required. Some other changes include:
- All memories are displayed all the time (no ranges, no "hide empty" or "show special channels")
- No "refresh" needed
- Automatic tone mode selection (if you choose a DTCS code, "DTCS" tone mode is selected automatically
- Guided "Cross Mode" settings (you will be prompted for TX and RX tones/codes)
- Better showing/hiding of relevant fields (you are only ever shown values that matter for a given channel)
| Old | New |
|---|---|
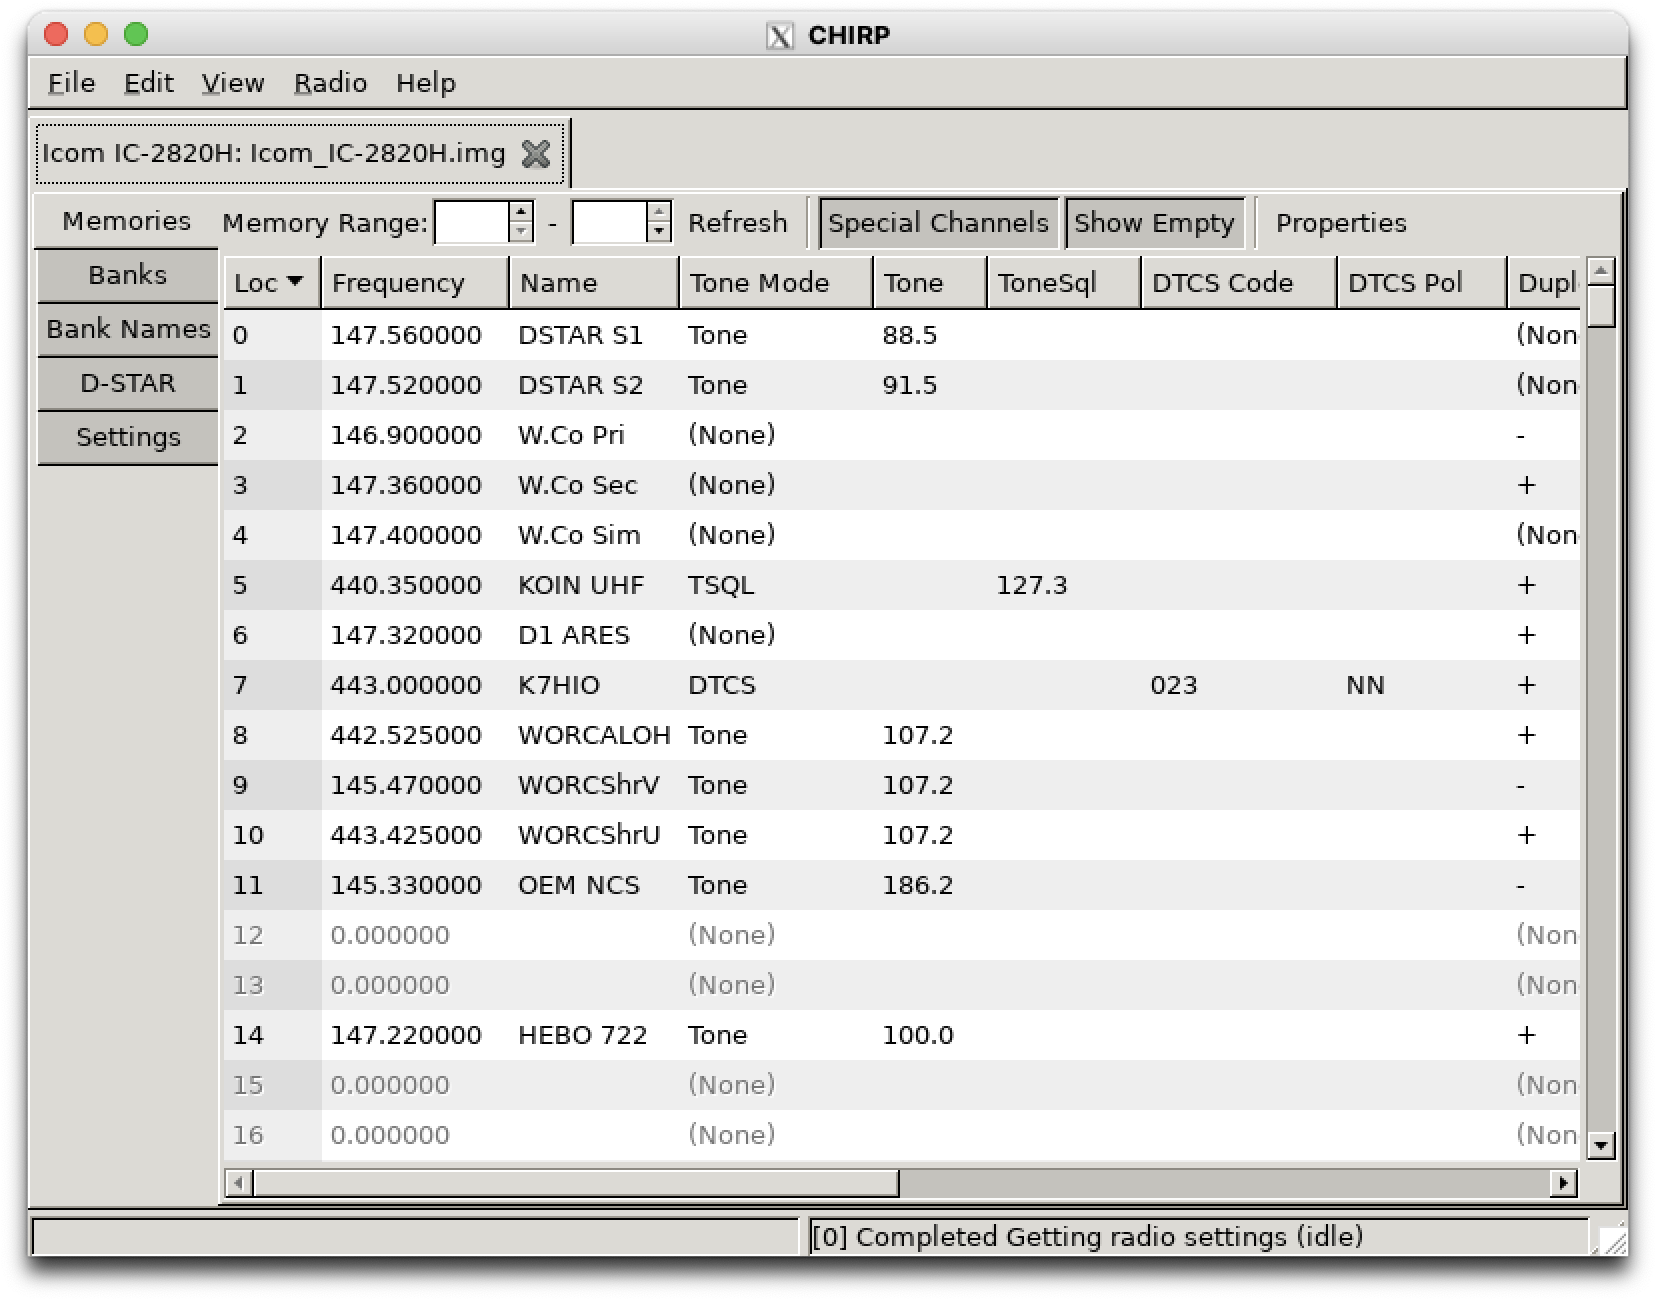 |
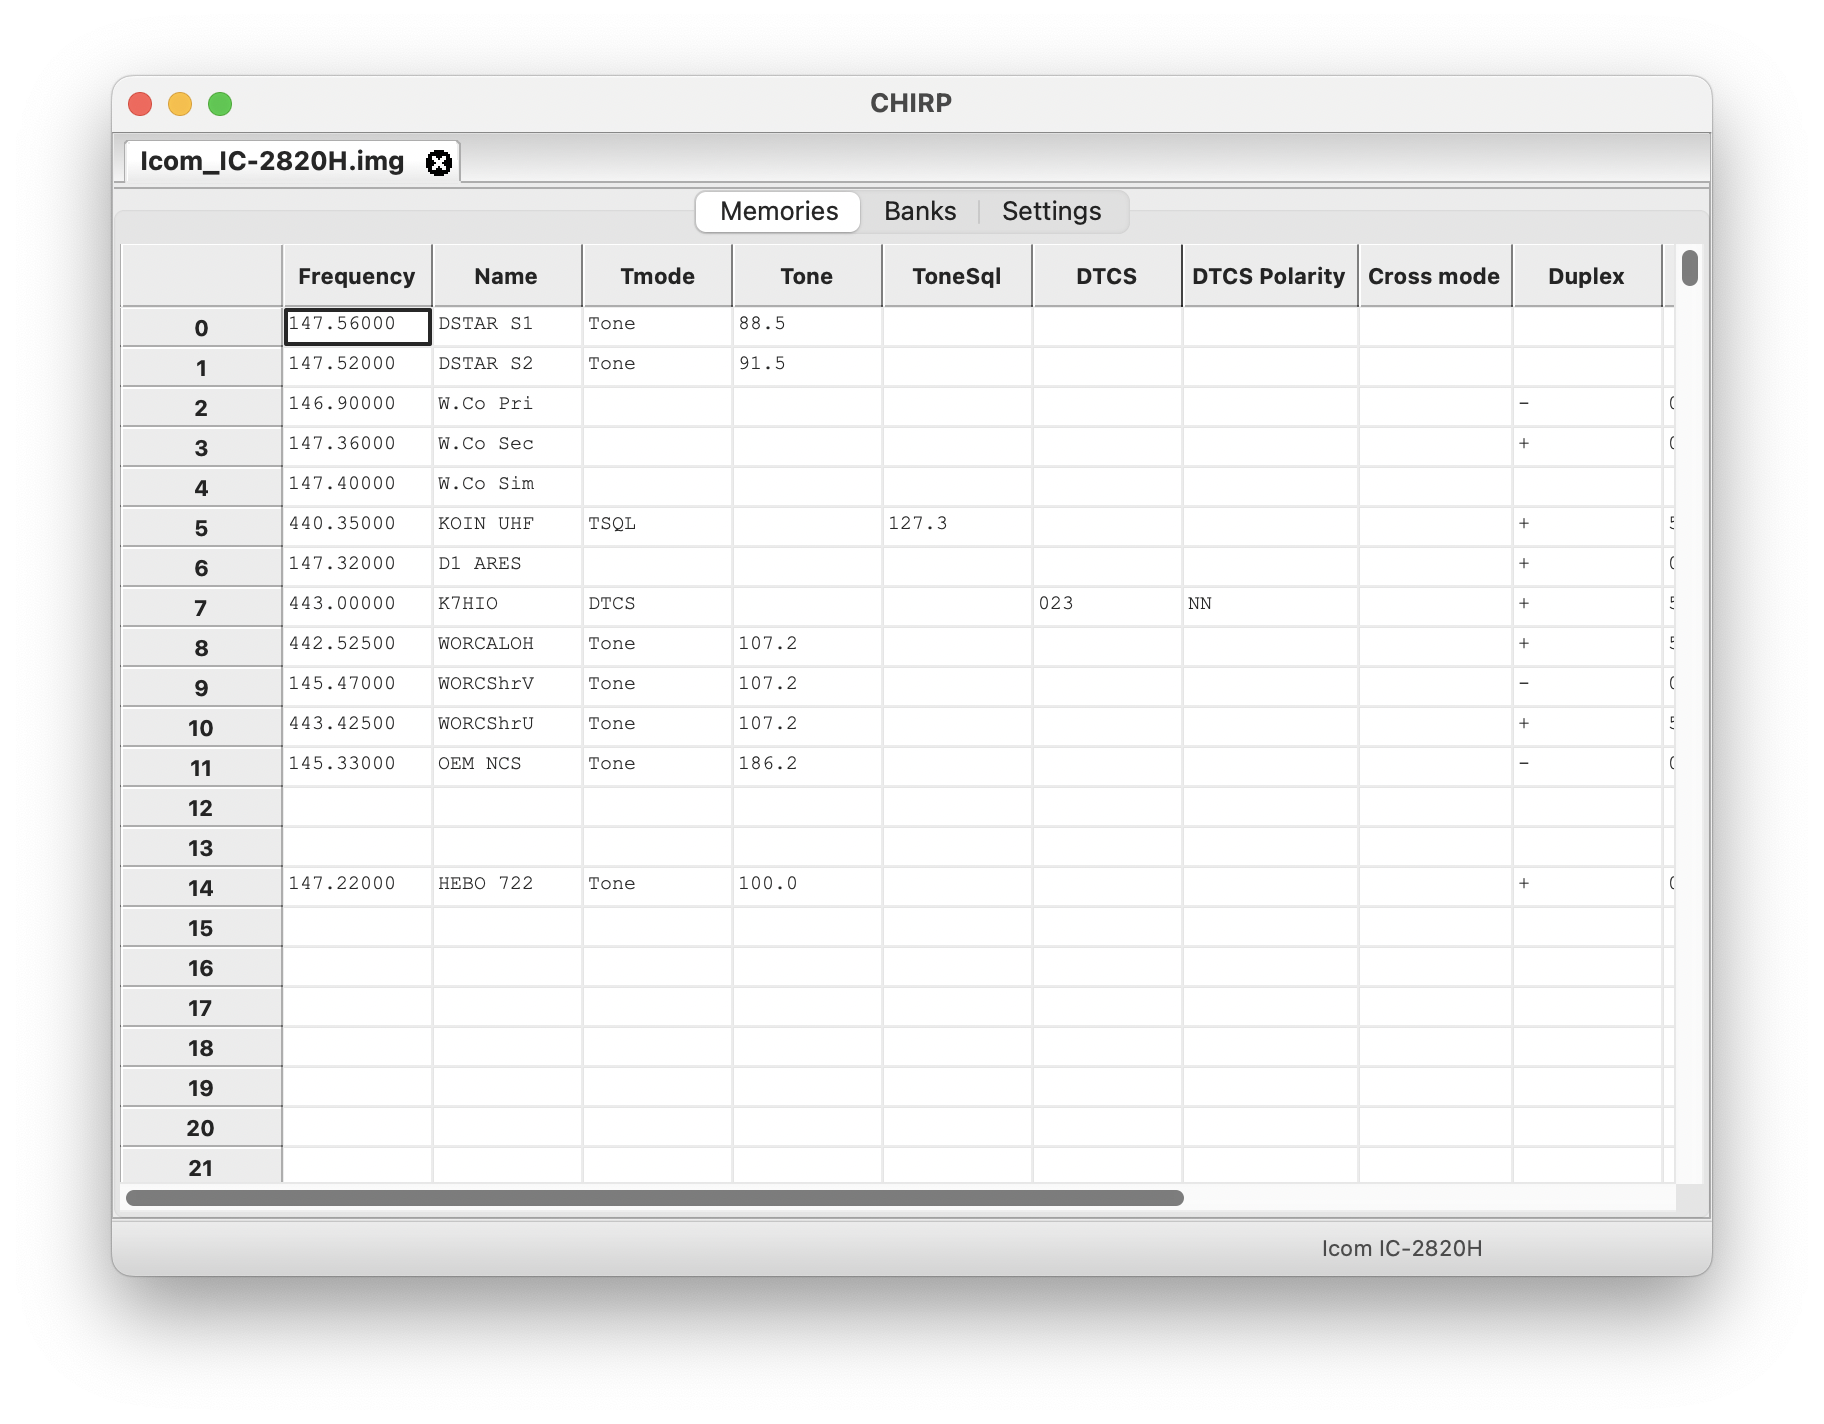 |
Easier to navigate multi-memory editing
The updated "properties" dialog lets you edit fields at will, showing in bold the ones that will be applied to the selected memories:
| Old | New |
|---|---|
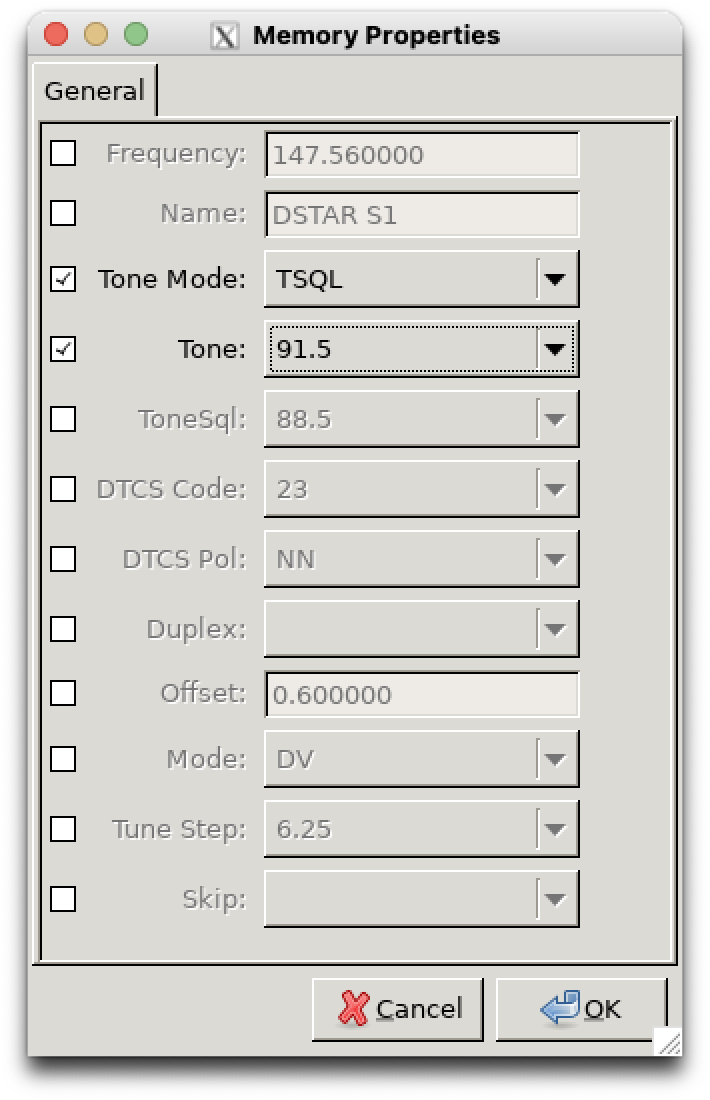 |
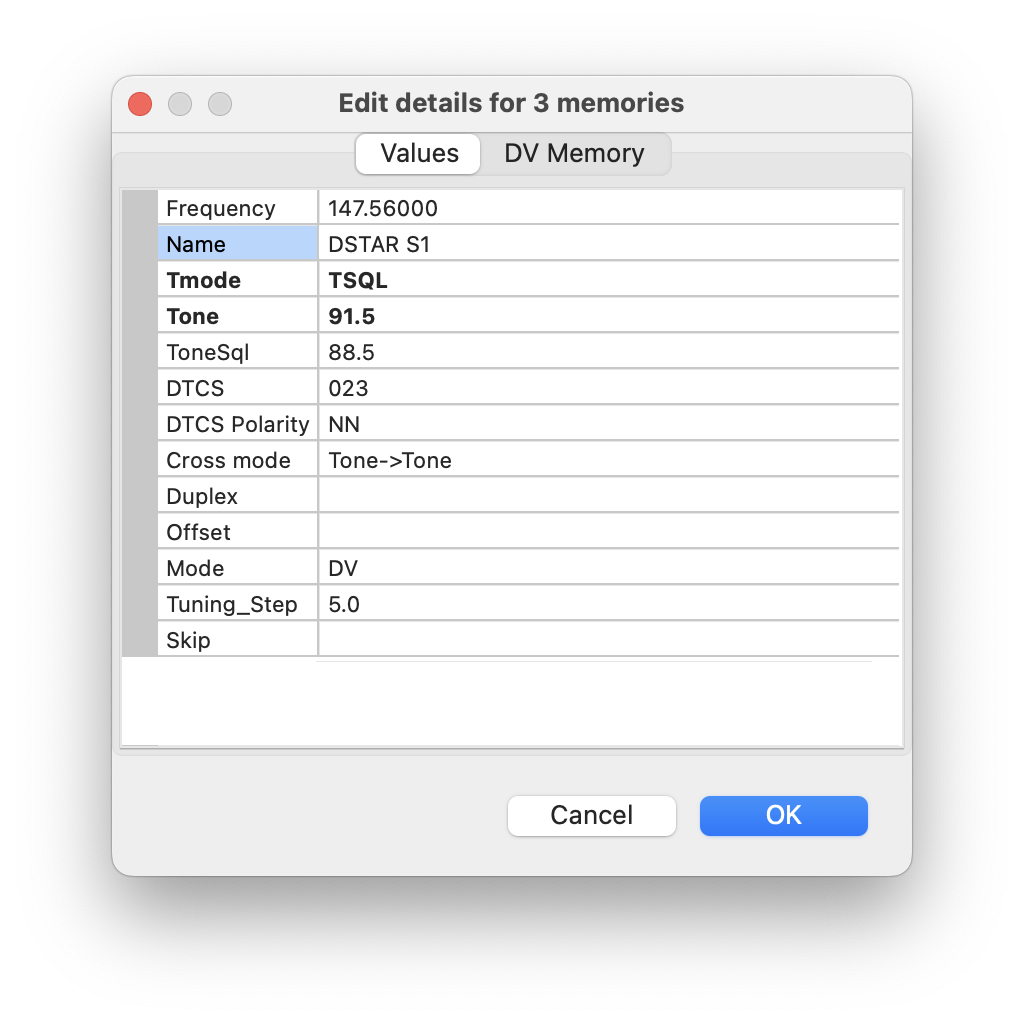 |
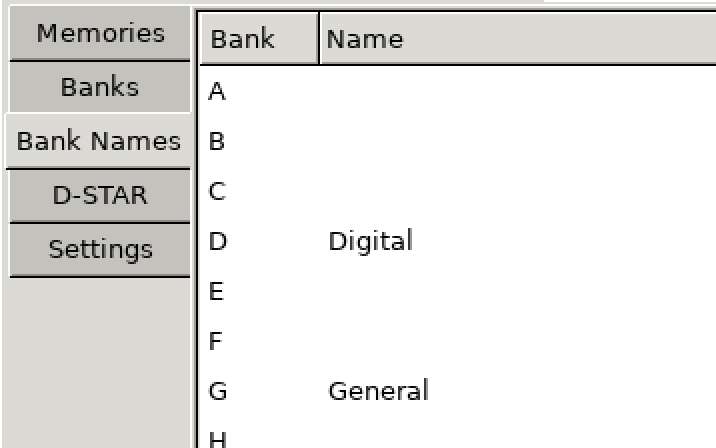
Unified bank editor
The Banks tab now handles everything related to bank editing without the need for a separate tab. If you have name-able banks, double-click on the column header to change the names:
| Old | New |
|---|---|
 |
 |
Settings editor
The new settings editor is more compact, easier to navigate, and shows more on the screen without as much scrolling:
| Old | New |
|---|---|
 |
 |
Simplified import and export
The confusing and redundant import and export workflow has been removed in favor of more reliable copy and paste functionality.
- To import memories from any kind of file, open it and copy/paste memories between tabs.
- External data sources (i.e. RepeaterBook) open in a tab; copy/paste channels into your radio's tab
- To export a radio image to CSV, use File > Export to CSV
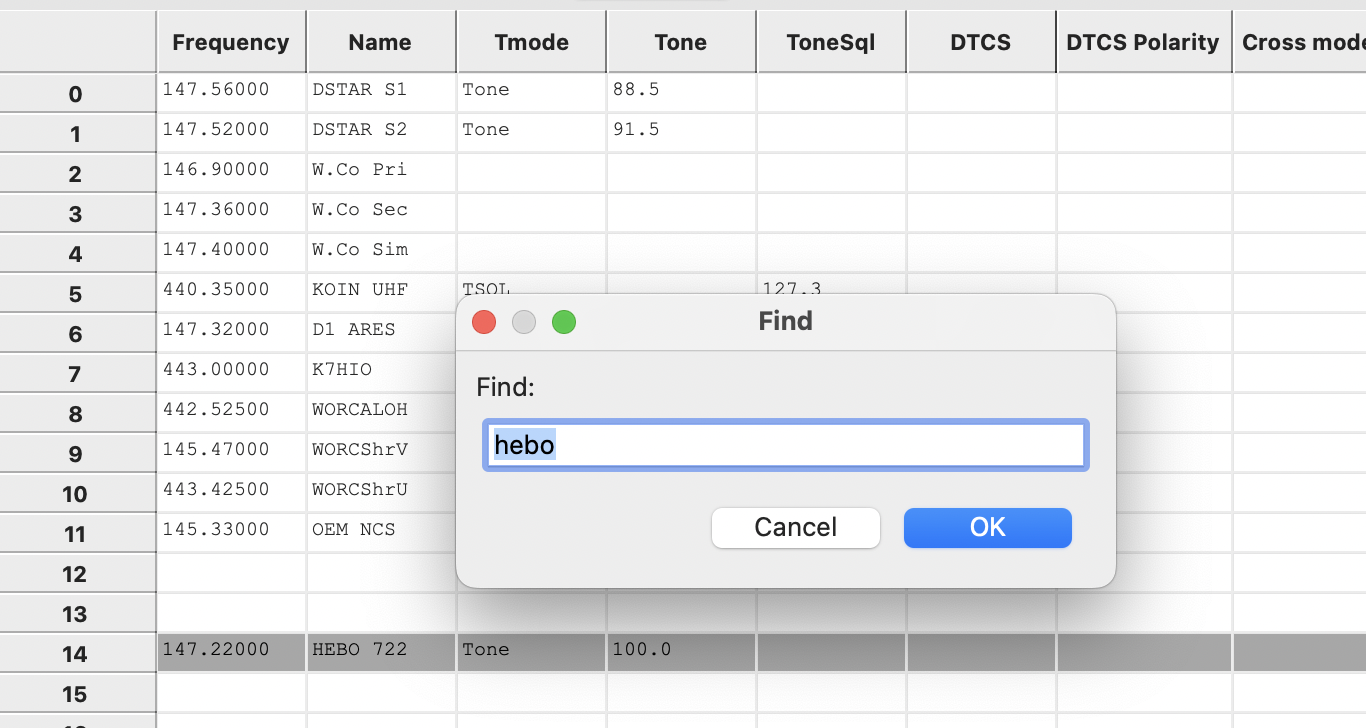
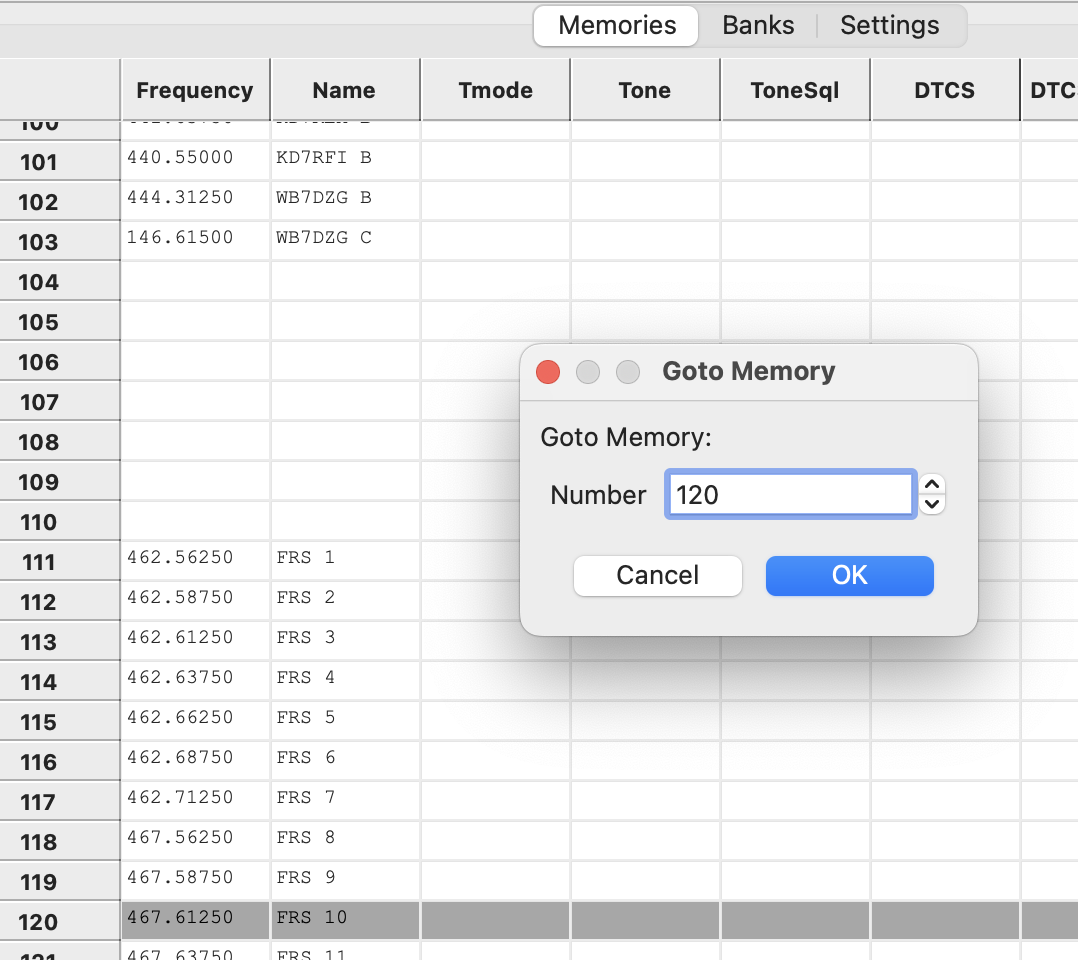
Improved navigation
Use the Find function to search through thousands of channels by name or frequency:
Use the Goto function to jump straight to a memory channel:
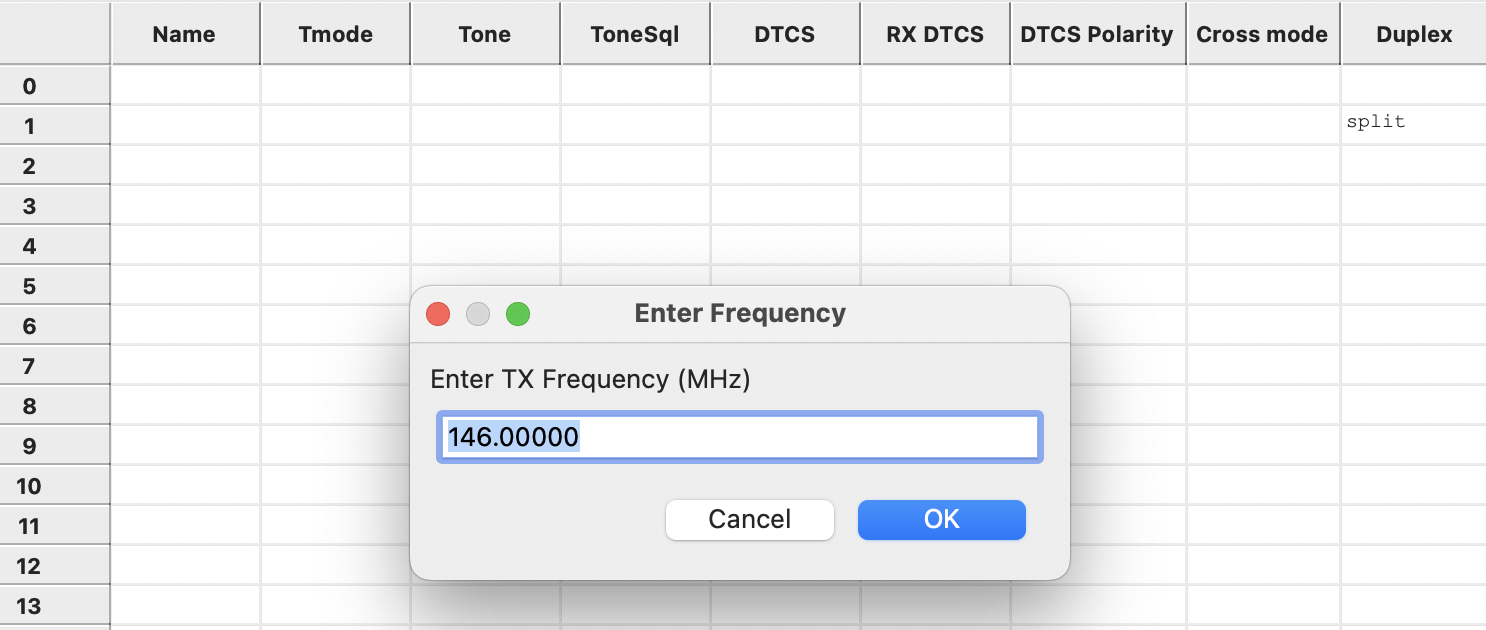
When CHIRP needs something for an obscure selection, it will prompt you instead of making you wonder what to do next:
Updated by Dan Smith almost 2 years ago · 11 revisions